I love to paint, paint furniture, picture frames, even painting my room a new color but when it comes to painting on canvas my abilities fall a bit short.
I am a wannabe artist, someone who can do some abstract art cause drawing has never been in my cards.
Let me not deceive you I do love abstract art and below is a picture that I absolutely love.
This painting was hanging on the wall of the MGM Hotel in Las Vegas and I would see it every time I went back to my room. I thought this would be easy peasy for me to do. Stencil for the bird and some layers of paint in shades of white, grey, beige and black. I haven't gotten to it yet but hopefully I will.
Quite a few years ago (7) I bought a picture that was so dated looking. You knew the era it came from just by looking at the picture, the frame and the overall colors. I liked the painting somewhat but really like the price $8.00 so I bought it.
So I attempted to re-design it to suit today's home decor look and also so it would work for my home. I don't have a before picture but you can see what it looks like now.
I kept the original design but just painted over it. The frame was a gold color and I gave it a crackle black effect. The mat board look was a 90's beige and I gave it a face lift with some green and brown crackle. I left the center background color the same and then just lightly painted over the leaves, stem and changing the color of the flowers. I'm proud of the job I did and that's why I still keep it around.
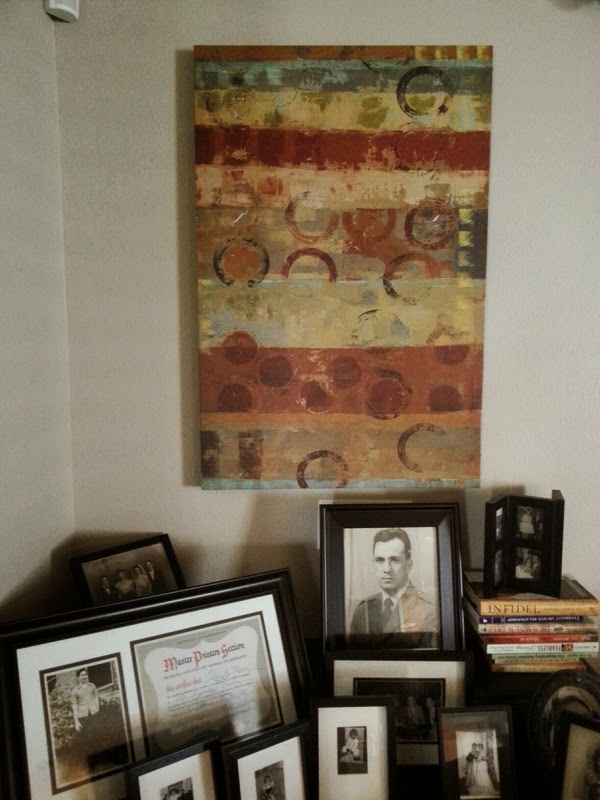
Now this picture I got at a thrift store for $10 and it appeared to be just the right colors for my room and I had a perfect spot for it.
Here it is in that perfect spot.
So after hanging it up I realized that what I thought it my head would be really good wasn't. Those colors just fight with the black and white photos I have on the desk. So off it came and the wannabe artist in me was going to fix it.
 |
| Stage one and two gesso and squirts |
My original idea was to just recreate the same picture with different colors. It didn't happen and I'm not sure why except once I got the paint in hand it sort of had a mind of it's own, a mentally deranged mind. The above painting had already gone thru with a gesso like hell out of it and then squirts of colors green red and blue. I also had added black to it but you can't see it in that picture.
 |
| Stage three |
 |
| Stage four |
Now here's the results and I have to tell you the funniest thing. I looked with horror on this painting and then sent a picture of it to my son. He said wow that reminds me of some artist can't remember his name and that's the background right? Yeah, yeah that's the background I said as I crossed my fingers so I wouldn't get punished for lying.
So for now the painting is resting, resting for a long, it's been traumatized by the wannabe in me . I promise I'll get back to it but it might take a while before I come up with a solution. Meanwhile Hobby Lobby had such cute prints that I might buy for that spot.
I'm partying at the following