Wednesday, October 15, 2014

Which Fabric Glue To Use For Trims

Not too long ago I posted about doing one of a kind pillows and I did make one that sort of had me feeling "wow this could be good" until I glued on the lace trim.


I used Fabric Fusion by Aleene and the glue dried so hard that the edge of the pillow with the trim (and the glue) was as hard as a rock.  This glue really holds but it's not good the way it hardens the fabric and trim that it touches.

Now I've also used Fabric Fusion to attach my fabric buttons onto my pillows and it works like a charm and I'll continue to use this glue for that purpose but not for adding trim to my pillows.

So today I decided to try another glue (Fabri-Tac)  to see how it works and it performs perfectly.


My trim is held in place and the fabric doesn't feel any different than before I added the glue.  Here's the pillow I'm working on now with it.


So when you need a fabric glue to attach something to your fabric try the Fabri-Tac.  btw I'm not being paid to say this nor did I receive any samples to try. I got mine from Walmart early this morning.
 
Update  It's the day after I applied the trim with the glue and it appears to be a bit stiff. It's no where near as stiff as the other product. I will continue to use Fabri-Tac as it's not as bad as the fusion one. I'd rather glue on my trim than sew it so I'm left with this product.


I'm partying here 


My Salvaged Treasures

Monday, October 13, 2014

One of a Kind Pillow Again!

I love to sew and love to take items that were meant for one thing and give them a new life with a new purpose.

I do that with fabric napkins and also doilies.

Doilies that want to be a pillow

I got this set of two doilies quite awhile ago in fact it's been so long I can't even remember what I paid for them. When I purchased them I had in mind that they would become a pillow. One doily for the front and one for the back.

After deciding to use these doilies for a pillow I then went on to decide how the pillow would look. First off I wanted ruffles on each end. The perfect fabric for that was my black and white toile fabric that I had aged with a tea bath.


I also knew that I wanted a bird image in the center on the front of the pillow and I went looking for that at The Graphic Fairy. So my design idea was all set and all I had to do was just get it done.

These doilies were an odd size so a standard pillow form wouldn't work and there was also the issue of holes in the embroidery design that I had to contend with. So a custom pillow form was needed.

Measuring the exact size of the doilies I used these measurements to make my pillow form with standard muslin fabric.


Pillow form waiting for stuffing

Now I could rant and rave about pillow stuffing and how much I use to hate making my own pillow forms because of the stuffing but all that changed once I started using Morning Glory Cluster Stuff. It's a light weight polyester fill that will not clump or cause lumps. I hate the lumps and this is why I use it. The one draw back is that the fill is so light weight that it feels like the pillow has no weight to it.


Morning Glory Cluster Stuff
Okay so the pillow form was made and now all I had to do was add the image I found at the Graphic Fairy


Graphic Fairy Image

I did some color correcting in my Photoshop program to give the image a bit more of sepia look.

I transferred the image onto the doily using transfer paper that I got from Dharma Trading  

 I ripped the black and white toile fabric at 4" with the intentions of having the ripped edges showing to give it a bit more........... look. (sorry can't think of the right word) Ruffled the fabric with my ruffle attachment and then added the ruffles to each end of the doilies.

With wrong sides together I then sewed all around the doilies using the decorative edge as my guide leaving approx 3" opening so that I could insert my custom pillow form.

Inserted the pillow form and then closed up that 3" opening.

I consider this one of my One of a Kind Pillows  but it does have a big flaw. The transfer of the image caused discoloration on the doily.  If you look around the birds your can see where I cut out the image on the transfer paper. It shouldn't look like this I really wanted it to look like the birds were directly printed on the fabric and not added afterwards.


Anyway it's done I've learned something from this but not sure how I can apply it to my next project but I learned.

I'm off to make some more pillows using transfer paper and napkins. Hopefully I won't be able to find any flaws in these.


Boogieboard Cottage

Mod Vintage Life

Dwellings-The Heart of Your Home

Wednesday, October 1, 2014

Being Creative Or Just Producing?

I've mentioned before that I had a soap making business. I would buy clear glycerin soap already made and recreate an artistic loaf of soap.  I loved coming up with new designs and one of my crowning glories (by my own estimation ) was a bacon fragranced soap.

At the time I sold lots of soap to the social media group Reddit and they were in love with bacon just like the rest of the nation and I was able to get a fragrance that smelled just like cooked bacon.

After acquiring the fragrance I went into design mode and came up with a pretty cool looking bacon soap. The day  I created that soap I was so proud of the job I did. Well this soap became popular  I sold a bit of it but the joy of creating it again and again become one of the demises of the business. It became so that I  hated making this soap, any soap,  hated the smell and the different steps I had to do to get it to look like this.


Fast forward to today and I'm making mostly pillow covers and again I'm getting caught up in just producing and not creating. Did I not learn my lesson with that bacon soap?

So now I'm of the opinion that just to keep me happy and that's important because I live with me and when me isn't happy it ain't pretty, I'm going to do one of a kind pillows. How fun will that be? I like it!!

I started doing my first one yesterday and it's still not done, and it's not perfect and I'm pulling my hair out but I'm happy.

As you do your craft you learn more and more about your medium like I did with the soap and I realize my mistakes with this pillow are just learning lessons on what to do and not do for one of kind covers.


Here's a picture of my first one of kind pillows.


My inspiration came from a sheer pink polka dot fabric that I acquired at a thrift store. I dyed the linen fabric to match the brown of the polka dots and added some vintage trim. My one of a kind pillows are a work in progress and I'll keep you guys informed on how I'm doing.

I'm partying at the following


Monday, September 29, 2014

For The Love Of Thrift Stores

For those of you who don't really know me I love to gamble......occasionally. I visit Las Vegas or even once or twice a year go to my local casino here in Florida. I love putting those quarters in the machine, closing my eyes, fingers crossed, wishing and hoping I get a really good payoff. Those darn slot machine always, always disappoint me and gobble up my money.  Once I've had enough I leave very sad, no wins just loses. Now I know you are wondering what the heck does gambling have to do with thrift stores. Well for me it's almost the same thrill, less costly of course.

There is a thrill I get when I find something in a thrift store that I love, that I believe is worth more than it's price, that can become something great, can earn me a few dollars. My fix for thrift store shopping has a greater hold on me than casino gambling (I shop thrift stores once or twice a week) and to be frank I'm a bit more successful at thrift store shopping than gambling coins at the casino.


My latest find is this 8 yards of linen fabric that I got for $1.00 a yard. At first glance I thought I got an $80 pile of fabric for the $8. Jackpot!  but I didn't do that well. The fabric once I got it home was only 45" wide so the $10 a yard estimate didn't hold true. Possible it's really worth about $40 maybe not a jackpot but definitely a win.

This fabric will go on to become........ well, I have plans, plans to dye some of the fabric, plans to make some white crisp pillow cases with lace, possible some ruffles on some pillows. Who knows for sure but it will become something great! (I hope)

I never, ever, ever, leave a thrift store sad, nope I leave happy, excited, thrilled and eager to get to the next thrift store. I love thrift store shopping!

I'm off to another store so keep your fingers crossed I find more gold.

Wednesday, September 24, 2014

I'm a Wannabe Artist!

I love to paint, paint furniture, picture frames, even painting my room a new color but when it comes to painting on canvas my abilities fall a bit short.

I am a wannabe artist, someone who can do some abstract art cause drawing has never been in my cards.

Let me not deceive you I do love abstract art and below is a picture that I absolutely love.

This painting was hanging on the wall of the MGM Hotel in Las Vegas and I would see it every time I went back to my room. I thought this would be easy peasy for me to do. Stencil for the bird and some layers of paint in shades of white, grey, beige and black. I haven't gotten to it yet but hopefully I will.


Quite a few years ago (7) I bought a picture that was so dated looking. You knew the era it came from just by looking at the picture, the frame and the overall colors. I liked the painting somewhat but really like the price $8.00 so I bought it.

So I attempted to re-design it to suit today's home decor look and also so it would work for my home. I don't have a before picture but you can see what it looks like now.


I kept the original design but just painted over it. The frame was a gold color and I gave it a crackle black effect. The mat board look was a 90's beige and I gave it a face lift with some green and brown crackle. I left the center background color the same and then just lightly painted over the leaves, stem and changing the color of the flowers. I'm proud of the job I did and that's why I still keep it around.

Now this picture I got at a thrift store for $10 and it appeared to be just the right colors for my room and I had a perfect spot for it.

Here it is in that perfect spot.


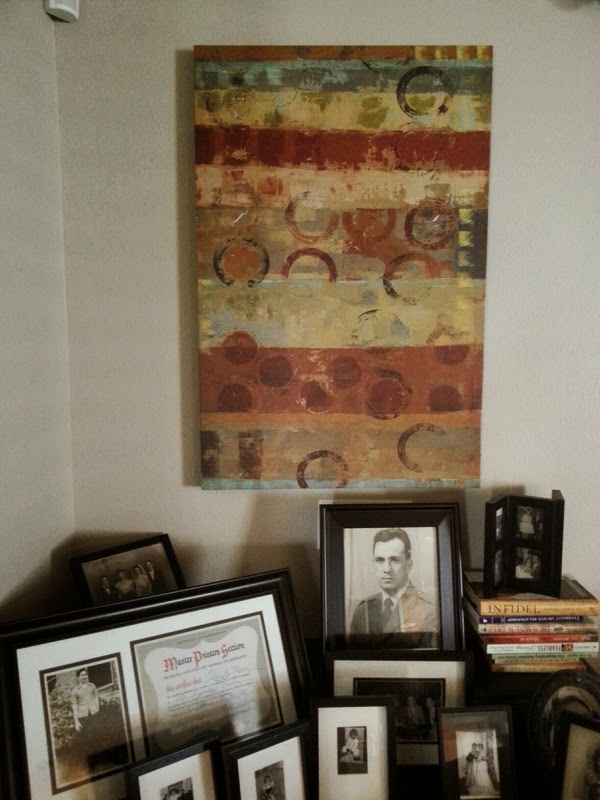
So after hanging it up I realized that what I thought it my head would be really good wasn't. Those colors just fight with the black and white photos I have on the desk. So off it came and the wannabe artist in me was going to fix it.

Stage one and two gesso and squirts
My original idea was to just recreate the same picture with different colors. It didn't happen and I'm not sure why except once I got the paint in hand it sort of had a mind of it's own, a mentally deranged mind.  The above painting had already gone thru with a gesso like hell out of it and then squirts of colors green red and blue. I also had added black to it but you can't see it in that picture.

Stage three


Stage four
Now here's the results and I have to tell you the funniest thing. I looked with horror on this painting and then sent a picture of it to my son. He said wow that reminds me of some artist can't remember his name and that's the background right?  Yeah, yeah that's the background I said as I crossed my fingers so I wouldn't get punished for lying. 

So for now the painting is resting, resting for a long, it's been traumatized by the wannabe in me . I promise I'll get back to it but it might take a while before I come up with a solution. Meanwhile Hobby Lobby had such cute prints that I might buy for that spot.


I'm partying at the following


Tuesday, September 23, 2014

The Art of Photography

I've been surrounded by talent almost my whole life, the talent of taking great photographs, yet it hasn't helped me one bit. I'd shake their hands, touch cheek to cheek, even beg but alas I still don't have the eye. It's an eye that creates beautiful photos that speak to us. My talents lie elsewhere but gosh me oh my I wish I had the eye.

When my Dad was a young man he was quite interested in taking photos, he married young, had kids right away (5 of us) so photography took a back seat. Here's one he took when he first got married that I absolutely love. These are both my grandmothers. This photo says so much and I think it's very special. This photo was taken in the late 1940's


My ex-husband's daughter Danielle  has a great talent for photography and back in the day when she was attending college in New York at Parsons she had an assignment to take mother daughter photos. Erica and I were elected as one of the photos she was doing. Now this was back in the early 90's and unfortunately I don't have the photo any more but I can tell you that she captured the essence of the relationship between my daughter and myself. At the time it was a bit hard to look at and I learned then that photos don't lie. With a click of a button she was able to show the world just how it was between mother and daughter.  Of course in the 90's my daughter was a teenager and you know how that is. Today that photo would look totally different. You can learn more about Danielle at her web site or see some great photos here or follow her on Instagram 

This is Danielle. Is this not a great shot?


Now my son is also talented taking photos.Here are a few of his photos of NYC taken with his smart phone. He's worth following on instagram and his web site  


So now you get to see the difference, the difference in their photo taking and my ......snapshots. Snapshots are what normal people take, normal people who don't have the eye.

My first real business was creating soap and I was pretty successful doing that. It was an on-line business and for that you needed good photos of your product and there was the stumbling block.  Here's some examples of those photos.


Focus was one of my biggest problems and staging was another
This was a banana soap but like always it's out of focus

I thought the soap on a granite tile would give it pizazz!
This photo is pretty good but it's one in about 1000
This picture I like and it's different, sort of artsy. This photo was done in a white box made from foam board. Here's a great tutorial on how to make one for yourself.

None of their talents rubbed off on me so I'm stuck, stuck having to take, retake and retake again photos of my products for Etsy. (I sell pillow covers now.)  This also tests my patience but that's another story. I wish I had the answer on how to get great photos each and every time but I don't.

Right now because it just doesn't pay to buy a good camera I'm taking photos with my smartphone. I would gladly spend the money for a good camera but I know that it wouldn't help me create great photos, I don't have the eye for it yet. My son made me put the yet in there he has more hope for me than I do.

Friday, September 19, 2014

Making Fabric Buttons

Now anything that can have me mixing and matching fabric to create a look I'm all in and making fabric buttons gives me that option.

For example I make pillows and add fabric buttons to them and most times the fabric button is a different pattern than the pillow. This makes me happy to create like this.


 I also like to make fabric button magnets and create a three button gift set. Here I used some left over fabric from some men's shirts I had. Love the blue and white look of these and I thought they all looked good together.


I've also made magnetic boards and added fabric buttons to them as you can see below.


I buy my button supplies at  cover buttons.  My choice for sizes are the 1 1/2" size or it's actually called size #60. I've also purchased size #36 which is 7/8" but really my favorite size is the # 60

Cover buttons offers the buttons with or without the wire eye loop. As I never need the loop I buy without.

You'll need a template so you can cut your fabric to the correct size and not waste fabric.

source
Then you'll need the assembly piece. It's what you need to marry fabric, aluminum button top and bottom.
Check out Cover Buttons link on how to use the assembly tool.

Source

The magnets I use I get at Walmart. For me they are the most reasonably priced without having to pay for shipping costs. I use the 3/4" size and that fits perfectly for the size #36 and #60 buttons.

Source
 If you also would like to make the gift set with the window tin you can get them at Papermart I buy the 2" x 2" x 1"

Source
Fabric buttons are a great way to use up those scraps of fabric that you've been saving for something cause if you are like me you just can't throw them away.