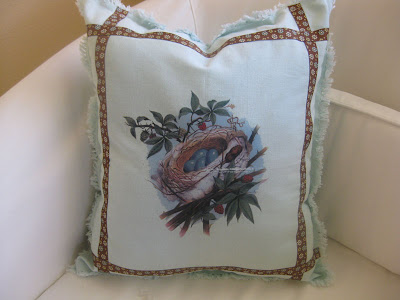
I love using fabric in my projects, I'm a bit of a fabricaholic, can't go into a fabric store without drooling and buying.
Sometimes though the newness of the fabric just sets me on edge a bit. It's the fabric stiffener and the brightness of the colors that I think does it to me and so I use tea dying to give the fabric a look of.... maturity. (that sounds so much better than old)
WHAT YOU WILL NEED
Tea bags of course, lots of them.
A Big Pot, Like A Pasta Pot!
Water!
Fabric
FIRST gather your fabrics. Keep in mind the size of the pot and gather according to what will fit. I've tea dyed solid colors and all sorts of prints from muslin to decorator's fabric. All the fabric I do dye is washable and I've never done a dry clean only type of fabric. I then soak my fabric in clear water, usually in my kitchen sink. Once all the fabric has been completely wet I then wring out as much of the water as I can and place them waiting for the dye bath. I've noticed that if I do this first step the fabric accepts the dye better and reduces streaks.
SECOND let it boil. Add the water to your large pot leaving room at the top so the fabrics won't cause your water to spill over. Set it on the stove and get that water boiling.
THIRD get your tea bags ready. I like to remove the little paper tag on the string just so the printed dye doesn't bleed into my dye. It probably wouldn't but just in case. How many you ask? Well I do about 30 bags for my big pot but I do like a visual tea dyed look. Do a bit less for a less browny vintage look. You will have to experiment to see what works best for you.
FOURTH add the tea bags. Once the water reaches the boiling point start adding your tea bags using a spoon to coax the bags into getting fully wet. With all the tea bags added to the pot and wet I let the water boil for about another 2 minutes to get a rich deeper brown dye.
FIFTH add fabric. Turn off the gas and then submerge the fabric into the brown dye using the same spoon you used to get the tea bags wet. You don't want to put your hands in boiling water, use the spoon. Yes! I let the fabric and tea bags co-mingle. I've never had the problem of the tea bags bursting open and causing a mess. If you would rather remove the bags do so after the 2 minute boil and do it carefully.
SIXTH relax and wait. Hard part is over now it's a waiting game. I usually don't start checking my fabric until the water has cooled down to lukewarm. That's about 2 hours. On occasion I've left my fabric in the dye bath overnight to get a real deep color but usually I'm happy with the results when I first check. Once the batch is done you could add more fabric to the cool water and the dye still works but it doesn't come out as dark as quickly. That's my observation.
SEVENTH Rinse and repeat. Your happy with the color keeping in mind wet it will look darker. Now back to the sink. Your fabric needs to be rinsed of all its tea. I fill my kitchen sink with clear water and swoosh my fabric around until I see the water turn brown. Empty the water from the sink and repeat, it usually takes about three times for the fabric to be totally rinsed out.. I line dry my dyed fabrics because I don't want to deal with fraying edges of the fabric that might happen in the dryer.
OOPS Not what you expected. There's always a do over here, just add your fabric to your bleach wash and it will be back to original color.
Now if I had to do large yardage of fabric I would have to find another way to do it, a pot even a pasta pot will hold just so much fabric. If I'm making a pillow I'll dye the fabric after the pattern pieces have been cut. I also find small scrap amounts of fabric that I have on hand and give them the bath also.
The top fabric on these pillows is a osnaburg fabric that I tea dyed to give it an aged look. The bottom portion of the pillow was an upcycled fabric from an aged seen better days pillow.
Tutorials are great but it's been my experience that you just need to get in there and get your hands dirty (try it) If you have any questions let me know I'd love to help.


