Wednesday, November 23, 2011

Know When To Fold Them! Know When To Walk Away!

"The Gambler" by Kenny Rogers, those lyrics where in my head as I was doing this cabinet.

Let me back up a bit. I'm moving 2 hours away from where I currently live and have decided that most of my furniture, pictures, knick knacks, etc will not fit in my new place. This cabinet was one of those that got the pink slip. It actually was the table that my soap melter rested on for my other business.  So those items that did not make the grade ended up in my booth at Knot On Main Street. This cabinet need a bit of work before I could send it over there and I was up for the challenge.


As I was scraping the peeling paint from it I discovered that it was actually a laminate cabinet that had been painted over, which explained the peeling paint.  I literally had to scrape almost all the paint off the sides and top. A bit of a big job.

So once that was done my idea was to paint the outside a chippy black paint and the inside a burlappy beige color that would look great with the baskets I had for the bottom.

Besides the paint job I also had to do something with the bottom tracks that was used for sliding doors that today are probably still trying to decompose in a landfill somewhere. My idea for the tracks was to get some wood trim at home depot for a cover up.


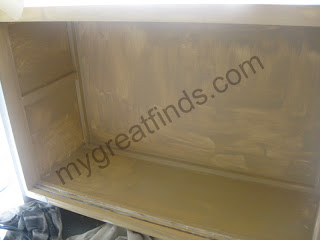
First paint was a primer (I used Kylz) on the formica to ensure it would stay put and not peel. I did not prime the inside thinking that it was not  laminate and it would be okay.. Here's a picture of the inside after one coat of the burlappy beige primer built in paint. It took three coats of paint. 

I could go on and on with the other things I did to this cabinet and I wonder why it took so long to come to the realization that it was time to walk away.  Here's what I learned.
  1. If you are going to resell start with quality and a formica type cabinet doesn't fit my idea of quality. 
  2. I love to paint especially the chippy paint technique but I realized that I really am not to crazy about doing it on large pieces.  So keep it small and simple.
  3. It's a bit difficult to make something look like something it isn't. Laminate will not look like an old wooden cabinet with chippy paint.  Though it could be that knowing the truth clouds my judgement.

So after many hours of scraping, priming, painting, fixing etc I decided that it was time to just walk away and let it go.  It served me well for about 5 years first as a display cabinet in my store, then as a work space for my melter for soap making. Here's where you might be asking why not use it again as a display piece? My philosophy for my booth is that everything is for sale and this isn't sale worthy.


I'd hate for this to go to the landfill but in back of my development (I live in a condo community) I'm sure someone will find it and give it a new home.

Thursday, November 17, 2011

What To Do With All This Stuff!

I love thrift store shopping and when I shop, I buy. So, I do a lot of shopping, a lot of buying and a lot of bringing home stuff. But there is just so much stuff I could personally use

So the idea was born, BUY, FIX, SELL, MAKE PROFIT.  (not an original idea of mine)

Last year I had a booth at an antique mall called Knot On Main Street, but because of some conflicts with my other business I shut it down.  Then in June there was a major fire there and the whole mall closed down until repairs could be done.  This past Tuesday they opened half of their 10,000 square foot space and I rented a small portion of that.  

Here's Bob the owner of Knot On Main Street
Out front of the store


Here's my space already painted but bare
My only job to get it ready for customers was to paint the walls an olive branch green and put up some green shutters I already had for architectural interest.  Oh yeah and bring in merchandise of course.

So here are some shots of my booth finished and waiting for shoppers.


Here's a shot of that wreath I made from the men's shirt collars and also a fabric covered magnetic board that I'll be doing a post on soon. 


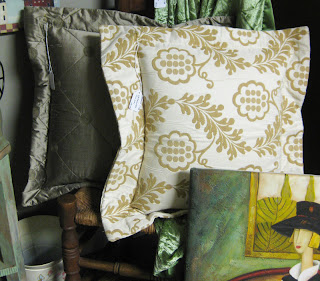
Those pillows were such a great find, the quality of craftsmanship is really evident. I got those at a church run thrift store and that thrift store is one of my favorites. I can spend hours there.

A wall of pictures and also my wreath chair.

Here you get to see those napkin pillows, my bon appetit dish and more pictures. Also my ammo box tops turned farmhouse chic chalkboards.

More pictures, more magnetic fabric covered bulletin boards.

Last but not least my men's shirt pillows.

So everything is priced, displayed and waiting for customers, cause as soon as some of this stuff is sold you know where you'll find me.

Tuesday, November 15, 2011

Fabric Napkins Take On A Whole New Look!

I've had these linen type napkins for quite a few years stashed in my fabric pile . Originally they were my aunt's and I think her plan was to embroider on them. I confiscated them because I loved the feel and look of the fabric and always thought they would make really cute little pillows. Plus you know they were like a blank canvas waiting to be something else. They measure 14" x 14"

Napkins waiting for the day to become pillows

But you know how you have these great ideas and they (the napkins) just sit there until tomorrow or the next day or maybe even the day after that. Those tomorrows became years.

So I'm here to tell you I finally got them made. What explanation do I have for finally getting them done?  I think I heard them calling to me from the fabric stash begging to be the promised pillows. When napkins start calling it's time to listen and do.  Sorry folks that's the best reason I can come up.

The edges were already hemmed so my idea was to just sew two together just below the hem line and then stuff with some loose fill. 

Plain white little pillows are just...... plain and I wanted more pizazz  like transfer image pizazz. I love the vintage french looking black and white images and the graphic fairy has some really great ones. So I went browsing on her web site and came up with a few that I thought would be perfect for the pillows.

This brings up the point of transferring images onto fabric.  Browse the web and you will find all these different techniques on how to do it.  It can be a bit overwhelming. After much research I decided that Lesley Riley's Transfer Artist Paper would be my method of choice. It does a wonderful transfer and it's so easy and I'm all for easy.


So I had enough napkins (10) to make 5 pillows. I used 5 different images from the Graphic Fairy.


Black and white pillows with a french flair
The above picture is just 4 of the 5 pillows and you only get to see 2 of the images I used from the Graphic Fairy . Below is a close up of another image.

This one is my favorite.
I think these little pillows make a great accent up against some larger pillows, maybe on a bed.